


I recently got back from Nordic Fuzz Con 2026, the first furry con I’ve ever been to. I had a great time there, met a lot of interesting people, made new friends and saw fellow IRL furry friends for the first time in a long time.
I do not have a fursuit but I still wanted to dress up in a way hinting at the shape and style of Finkel, which is why I made a wearable replica of Finkel’s horns to wear around the con. (I also managed to find a very Finkel-coded knitted scarf to wear at a damaged-goods store for super cheap, score!)
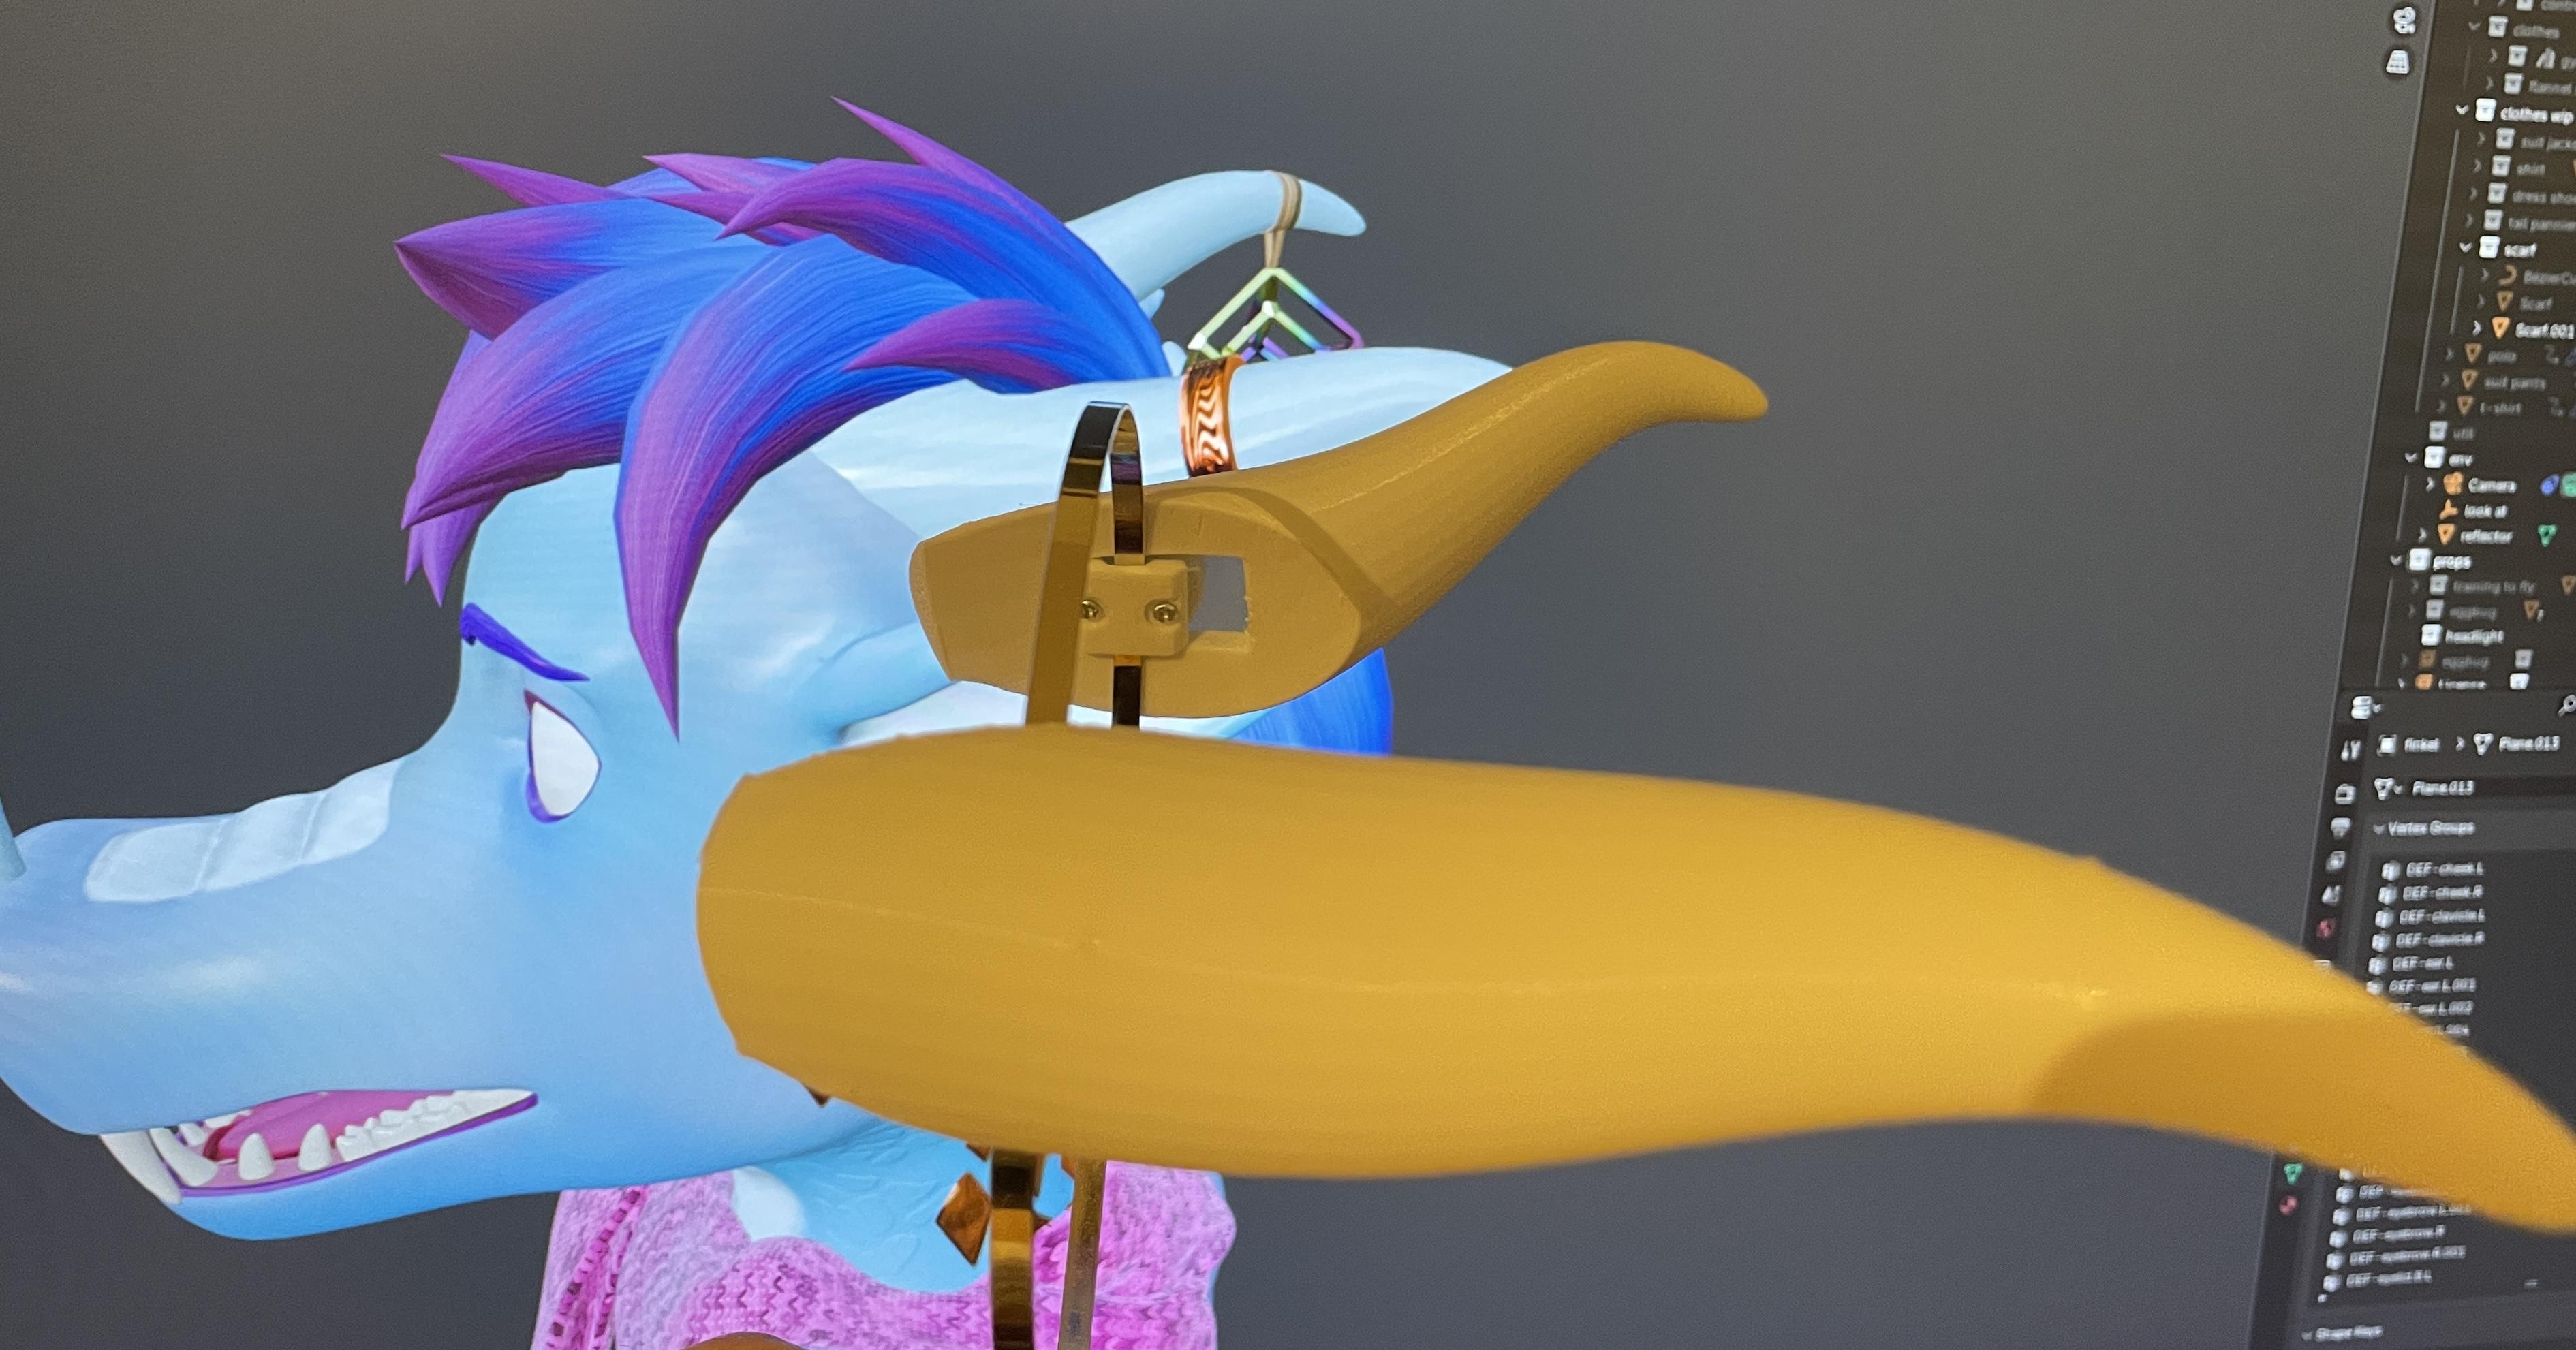
Multiple people asked me for the .stls for making the same horns, which is why I am writing this post and sharing my files on this site. In this post I will share the .stl files needed to print the horns and show you how to assemble them. I will also share the blender file I made them in, allowing you to customize the horns to your liking.
A few things before we start:
-
All credit for showing me the original idea goes to @bluefire. In particular, I was impressed by the way he managed to make his horns using no infill in order to keep weight down, something which I also wanted to achieve with my design.
-
If you are one of those who asked for the .stl files and are thinking to yourself something along the lines of Finkel, there is no need for you to put all this effort into sharing these files just for my sake, please rest assured that I am super proud of my horns, had great fun making them and I take absolute delight in getting to infodump about them on my web page. So thank you for giving me reason to do so!
Downloads
finkel_printable_horn_truncated.stl
finkel_square_band_bracket_export.stl
finkel_round_horn_bracket_export.stl
finkel_round_band_bracket_export.stl
I release these models and the blender file under the CC BY-NC-SA 4.0 license.
Printing
Horns
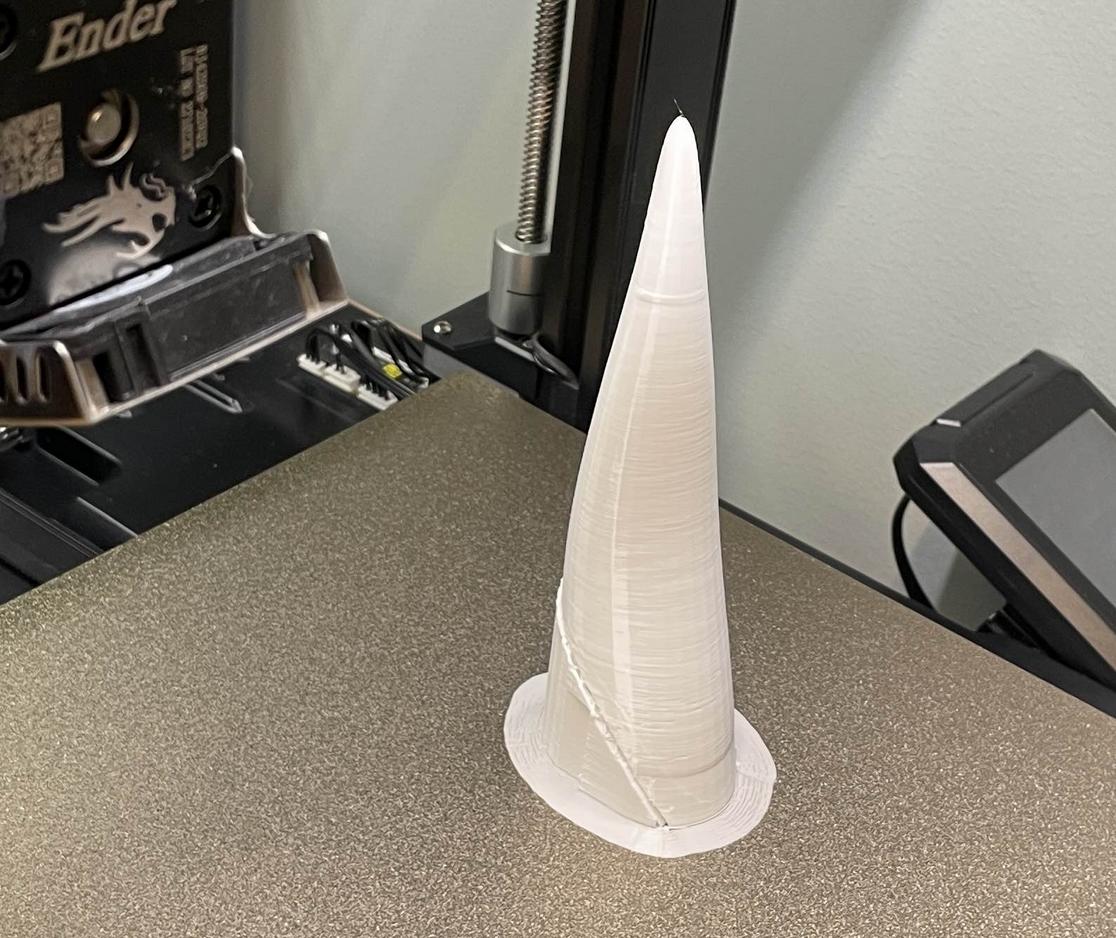
The horns are meant to be printed standing upright, so you will have to rotate them 45 degrees around the x-axis in your slicer. You will need to use supports that connect to the base surface of the horn. Also make sure to add support blockers to stop supports from being generated up through the rectangular hole in the base. The idea is that there is no need for infill inside the horns themselves, in order to keep weight down. Some infill is needed for the inside of the walls that make out the base of the horns.

My ultimaker settings. Support overhang angle was reduced so that you get supports connecting to the entire base surface of the horn. The big cube is a support blocker that envelops the top part of the horn, to prevent supports from reaching up into the horn itself.
My initial attempts at printing was using the finkel_printable_horn model, however due to the fact that it has a very small contact area with the build plate made it eventually topple over before it had grown tall enough to start leaning against the supports. For this reason I made the finkel_printable_horn_truncated version, which has a small part at the bottom sliced of so that it starts out with a bit more contact with the build plate. Not 100% aesthetically pleasing but good enough for me.
You will need to mirror the horn model to create the opposite side version of it.
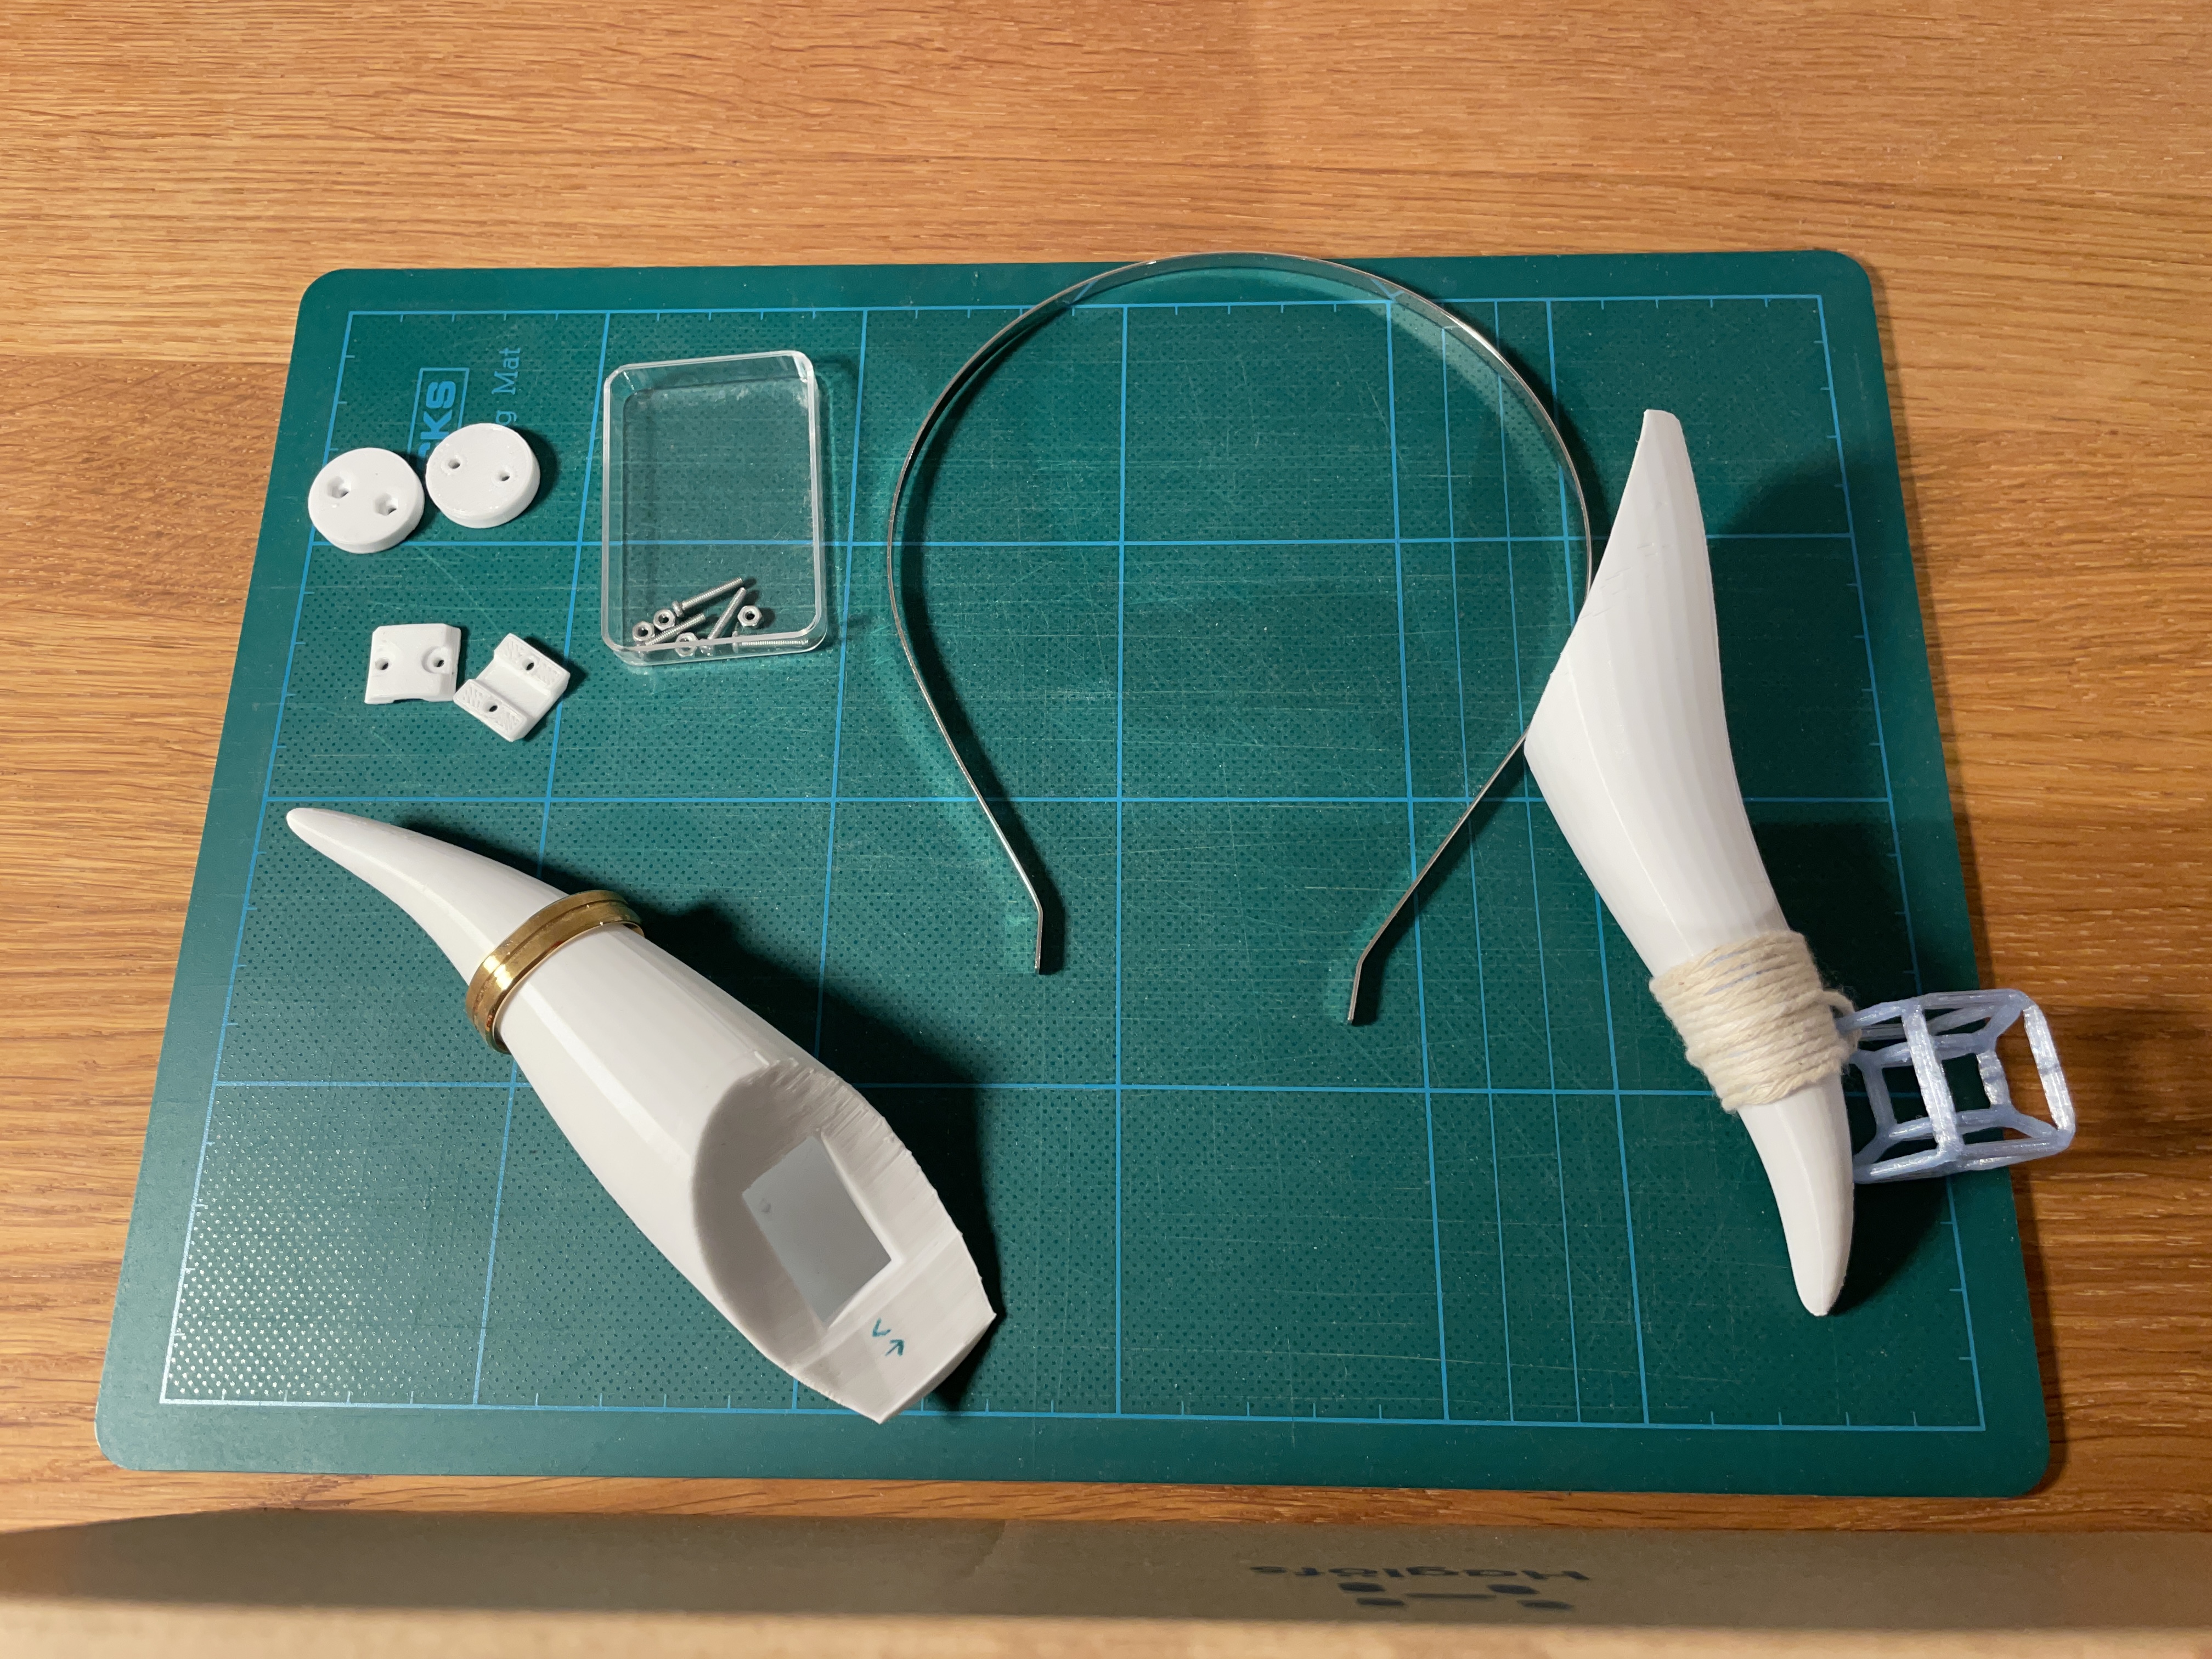
Brackets
Print 2 copies each of finkel_square_band_bracket_export and finkel_round_horn_bracket_export.
The finkel_round_band_bracket_export model can be used for custom horn designs that can be adjusted by swiveling the horn around the point where it connects to the head band. For my horns this was not necessary.
Assembly
What you will need
-
A metal headband. My headband is 5mm wide and I got it from a generic cheap-jewelry-and-accessories store.
-
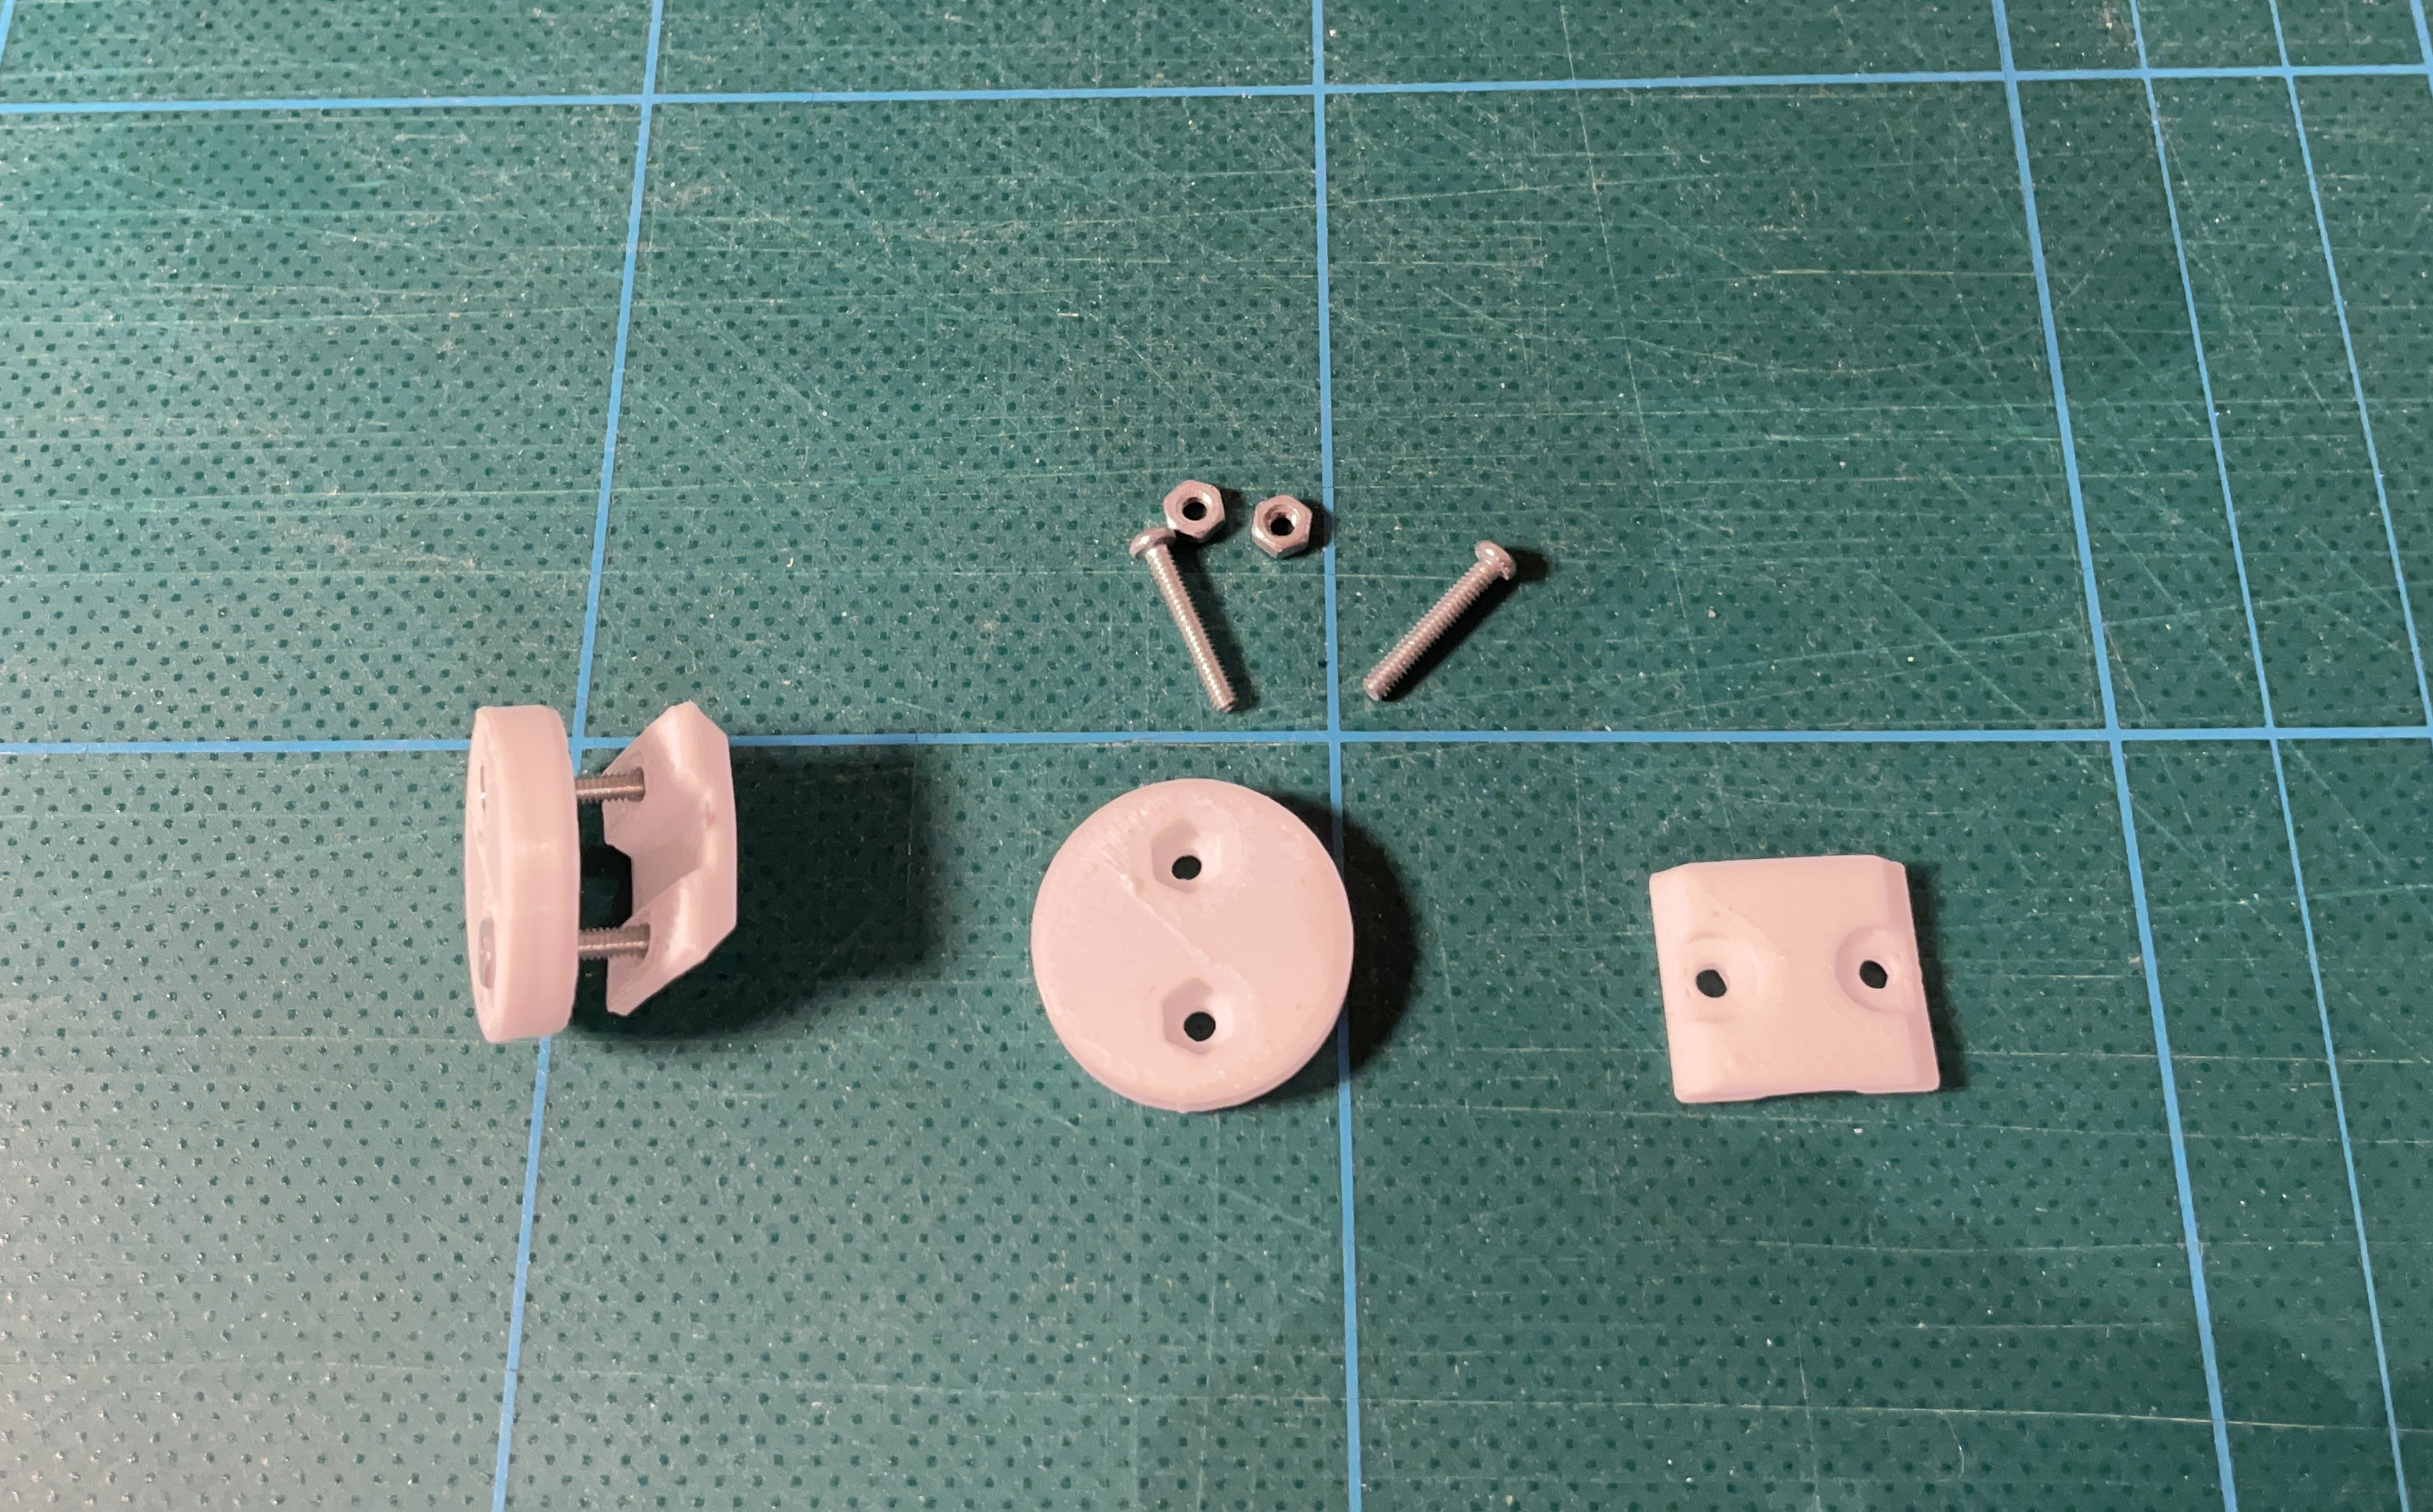
4 M2 nuts
-
4 M2x20 screws
Instructions
Assembling the horns is really annoying. Sorry about that. However, as I was eventually able to assemble the horns with the current design, I never felt the need to improve it to make it easier. Using longer screws makes assembly easier but beware of the fact that you can end up perforating the far wall of the horn when the screw is too long.
Put two M2 nuts inside the two hexagonal holes of the round horn bracket. Thread two screws through the holes in the band bracket, then through the holes on the underside of the horn bracket and screw them into the nuts on the other side. Screw them far enough so that the tip of the screws are flush with the opposite face of the nuts but no further than that.
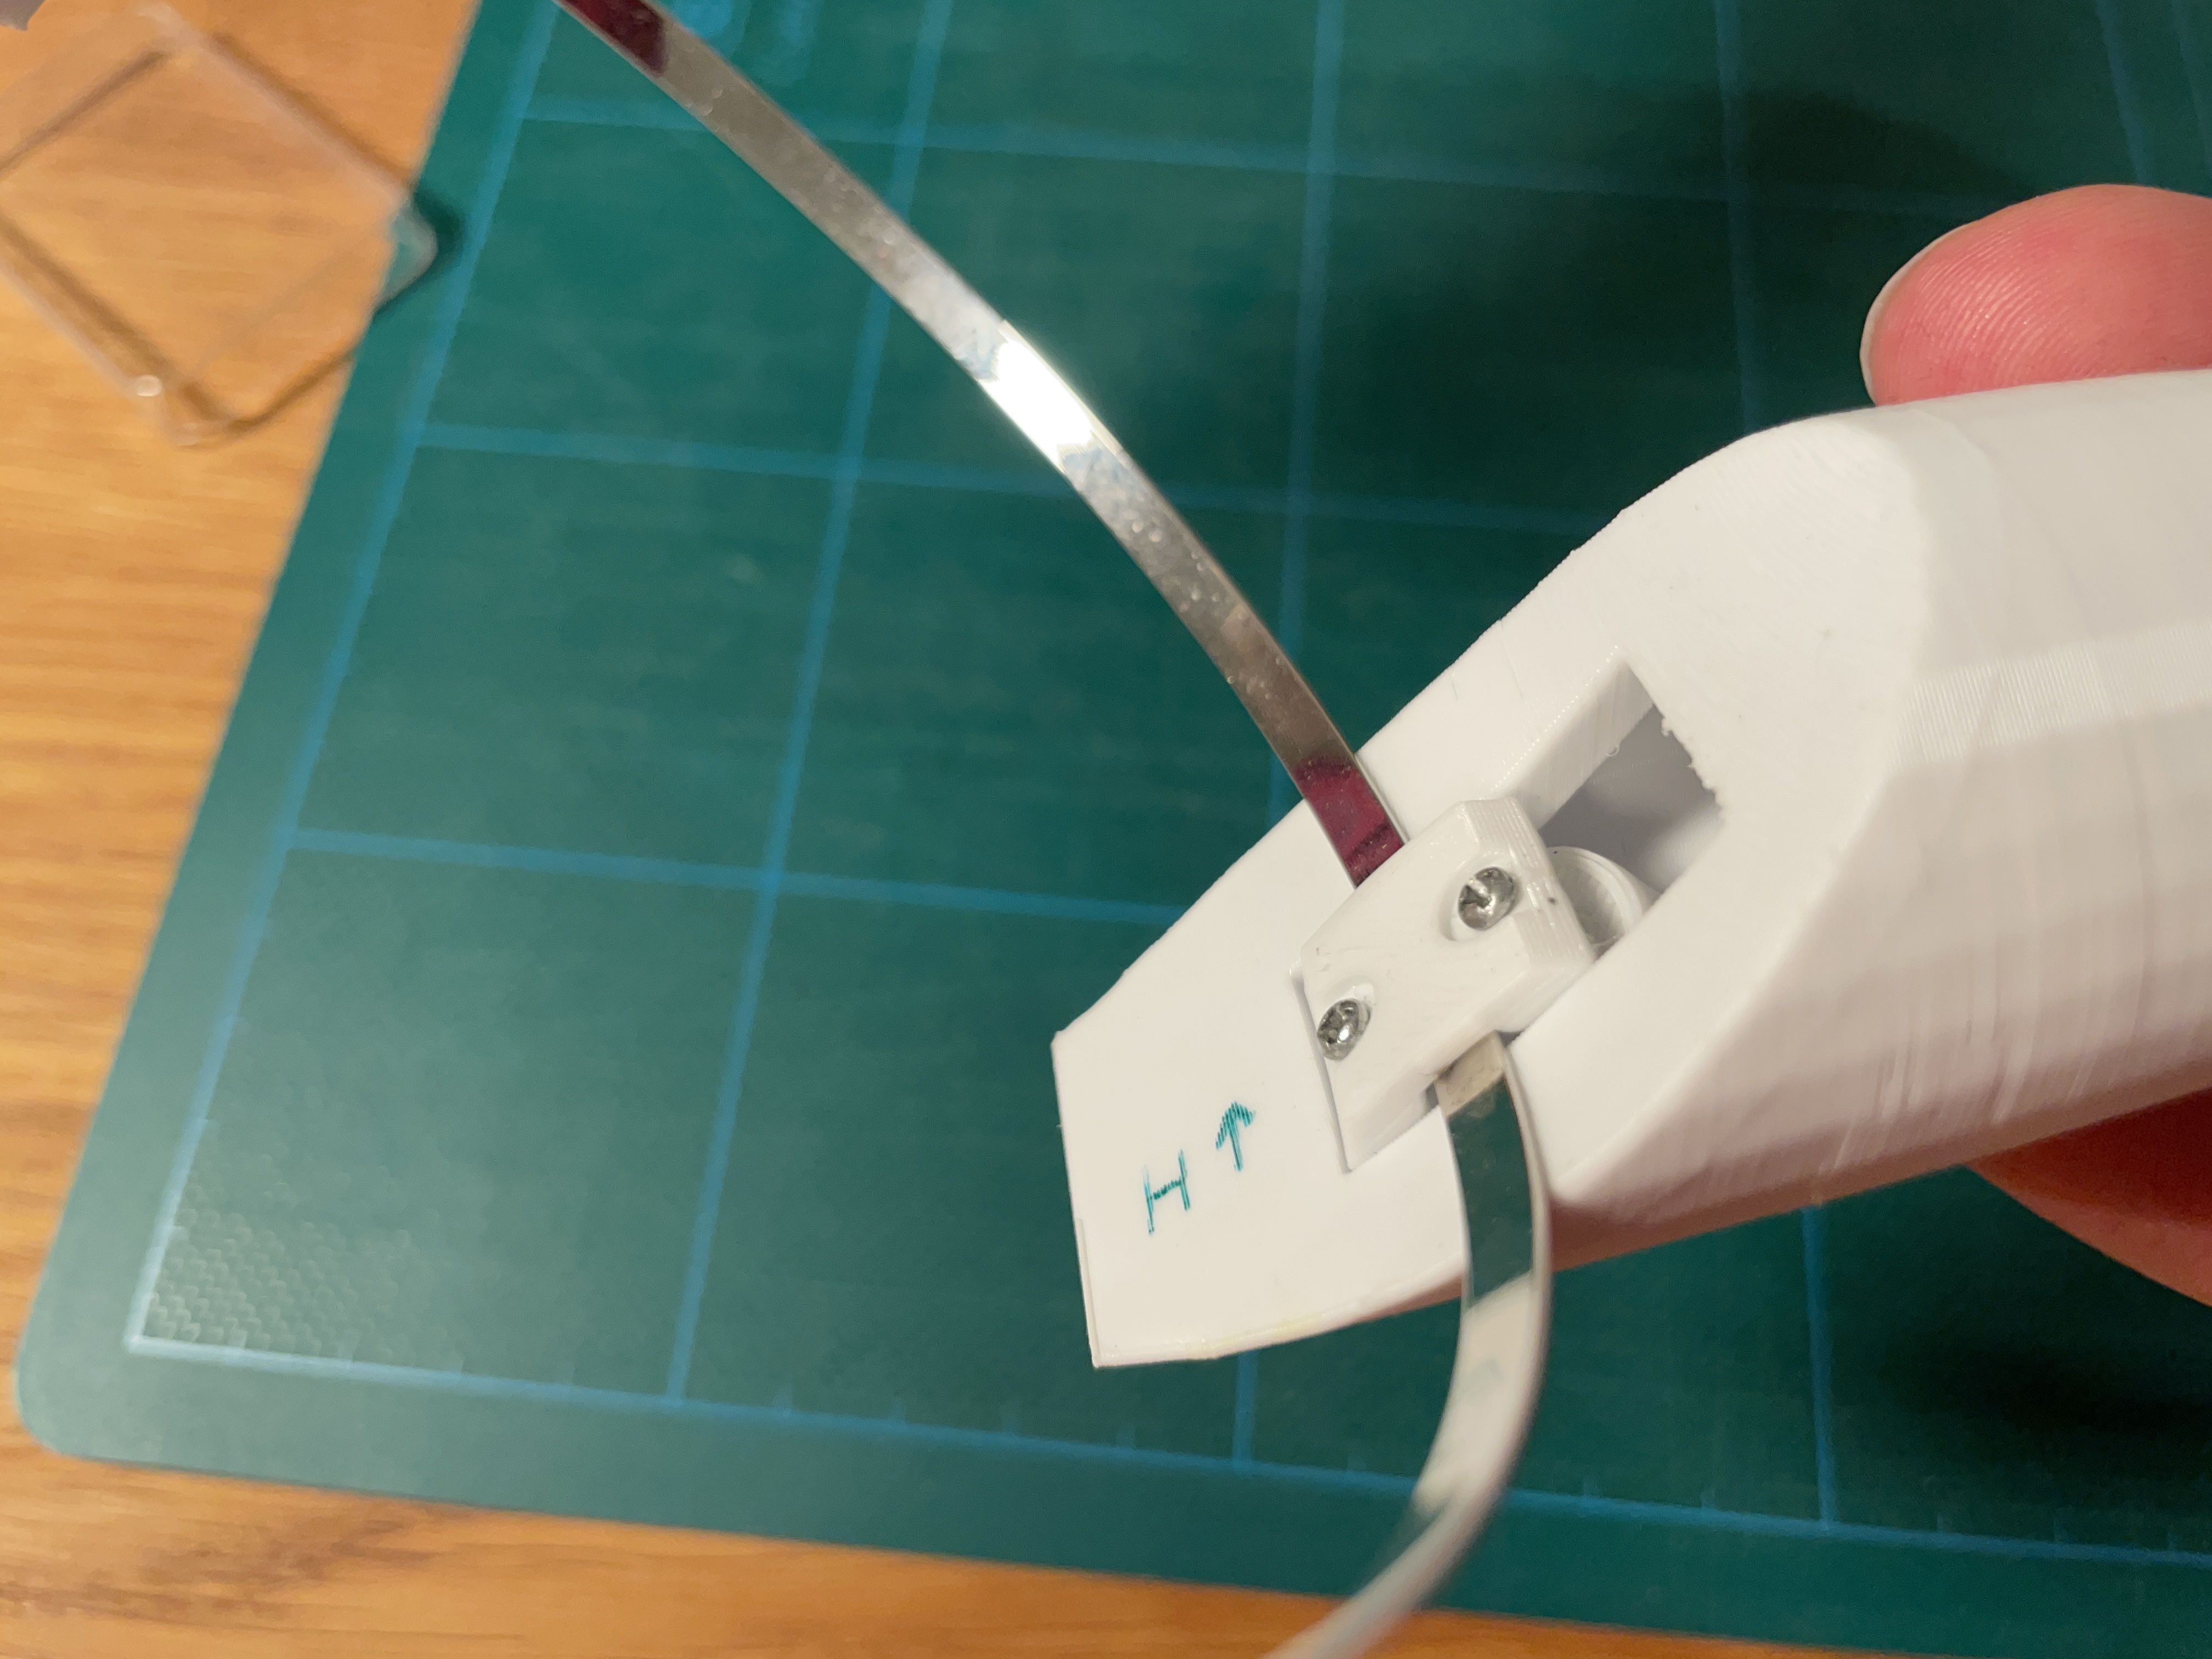
Work the horn bracket into the rectangular hole in the base of the horn, with the band bracket sticking out towards you. Finagle the head band between the gap formed by the base face of the horn and the groove in the band bracket.
For my headband, I found it easier to insert it rotated the wrong way, then rotating it correctly once I had inserted it in the channel of the band bracket. This was due to the sharp bend at the ends of the head band otherwise preventing me from inserting it. Your mileage may vary.
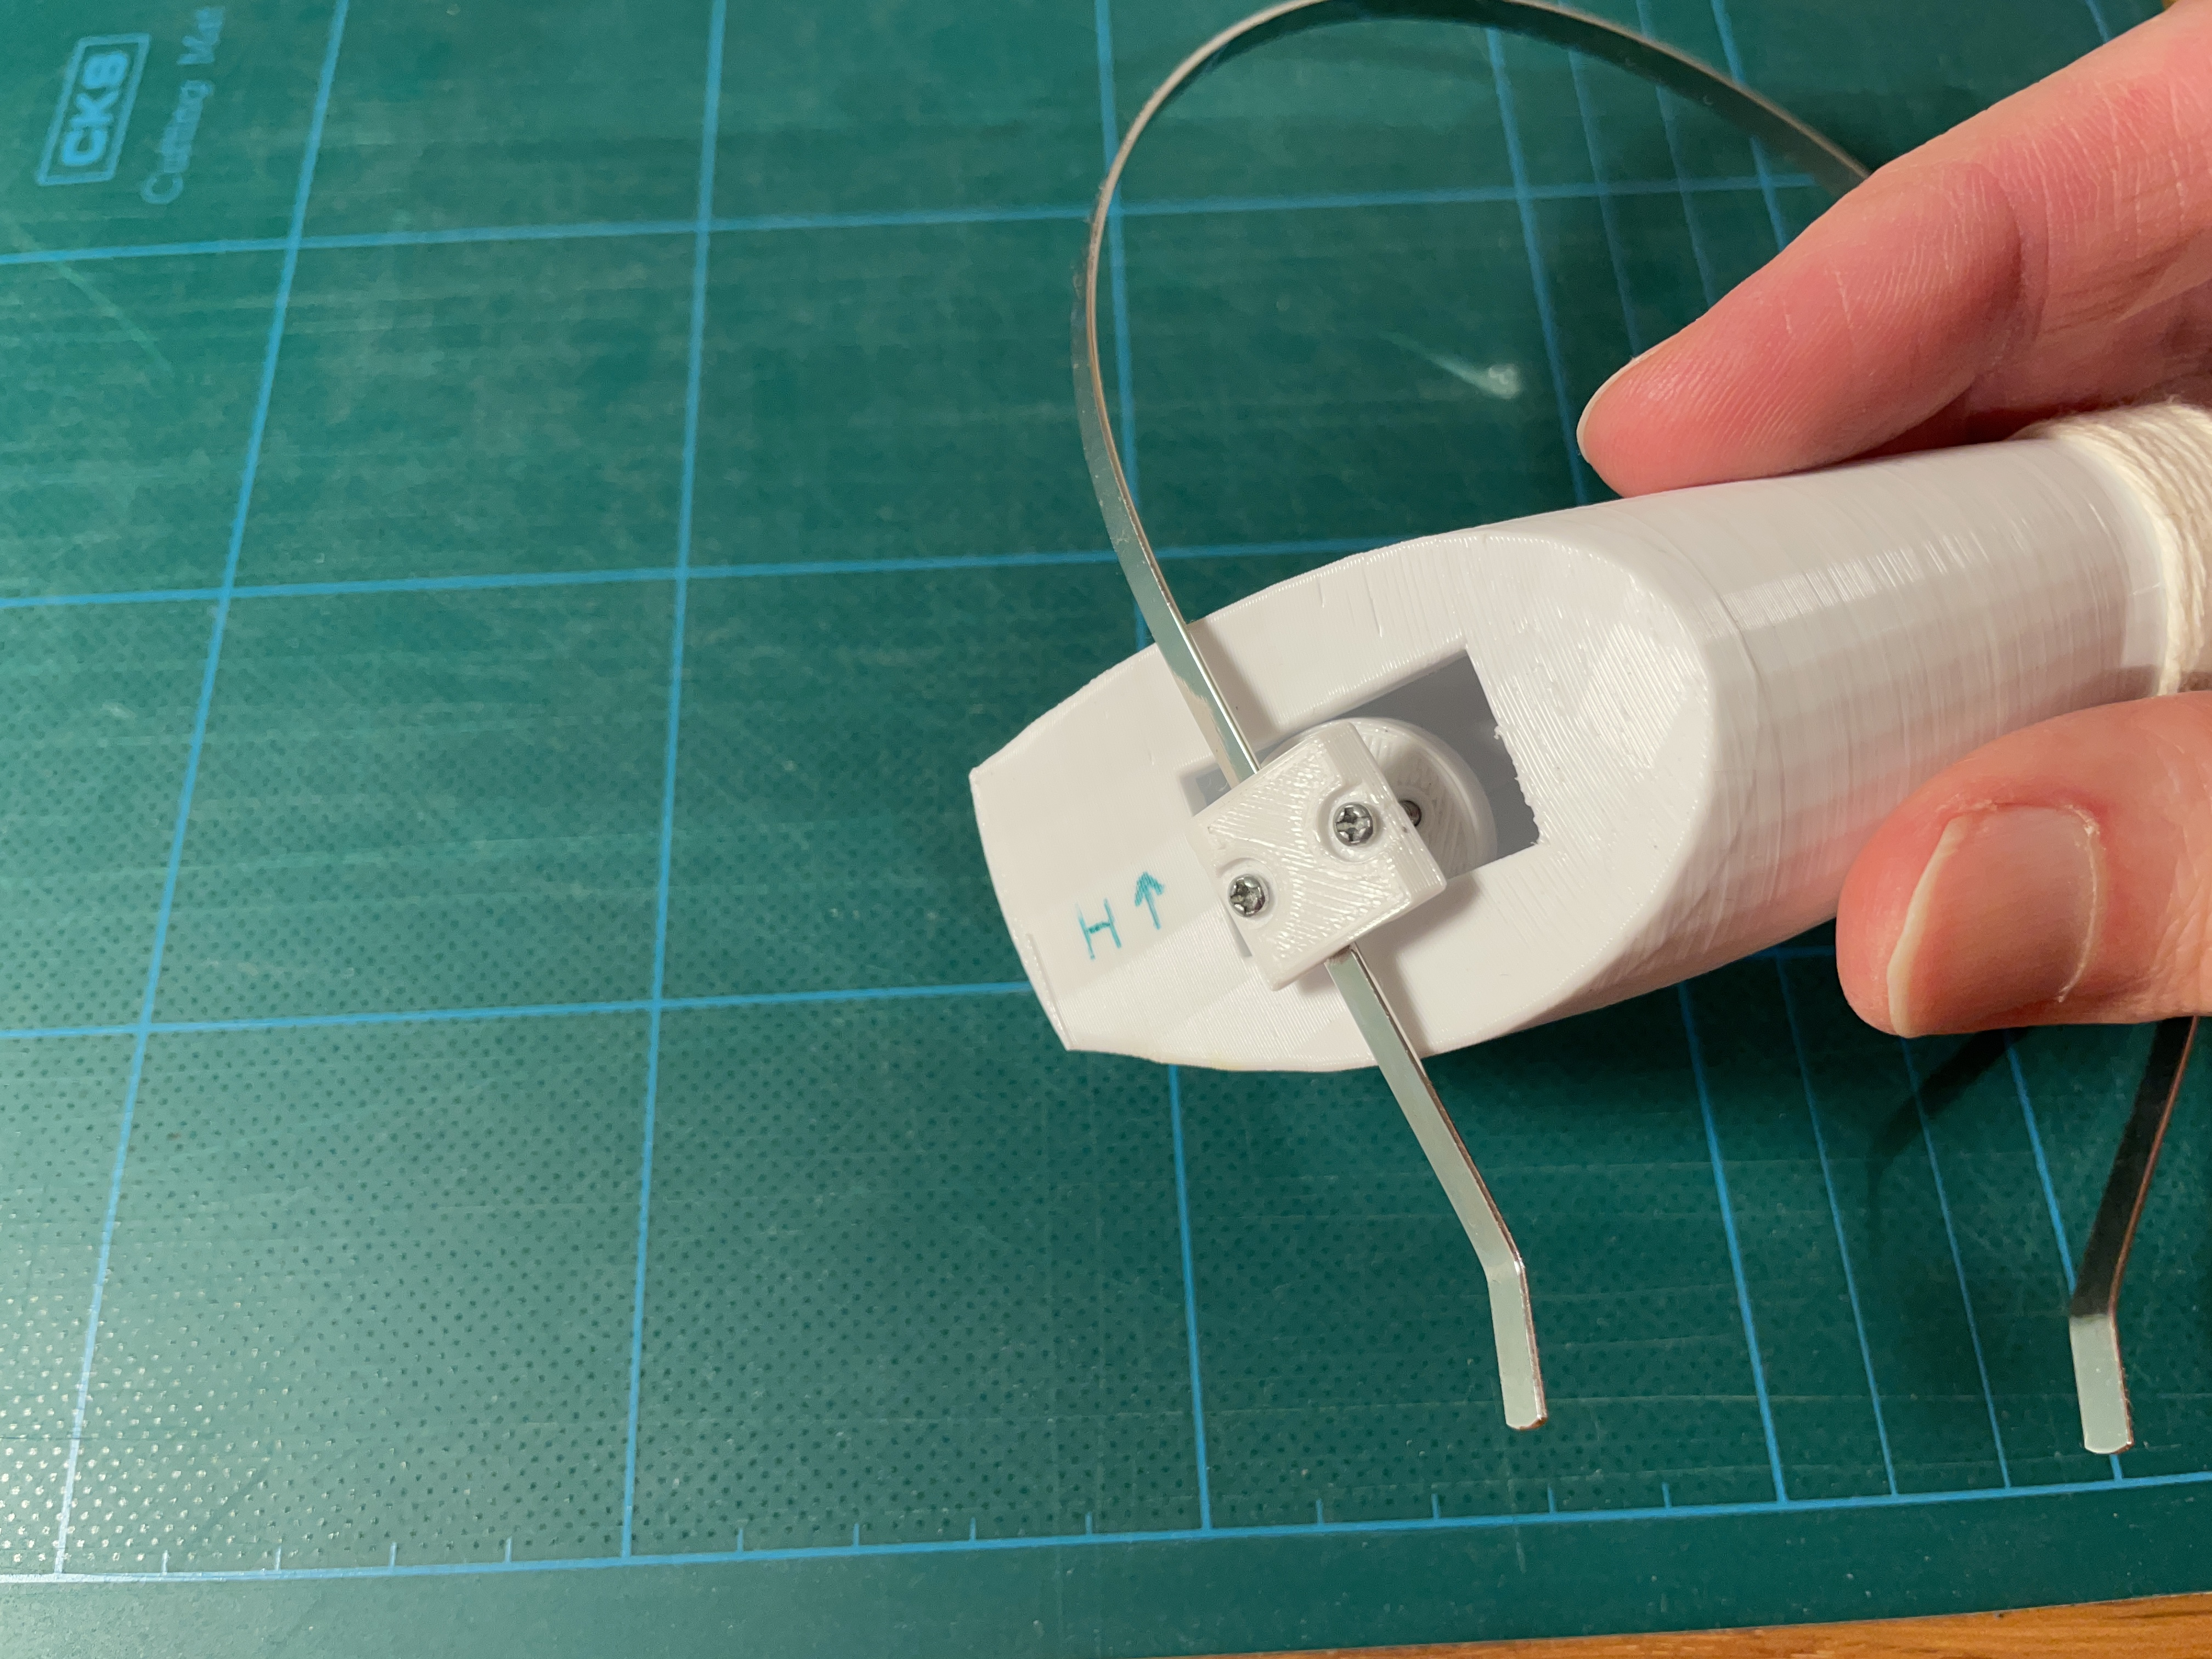
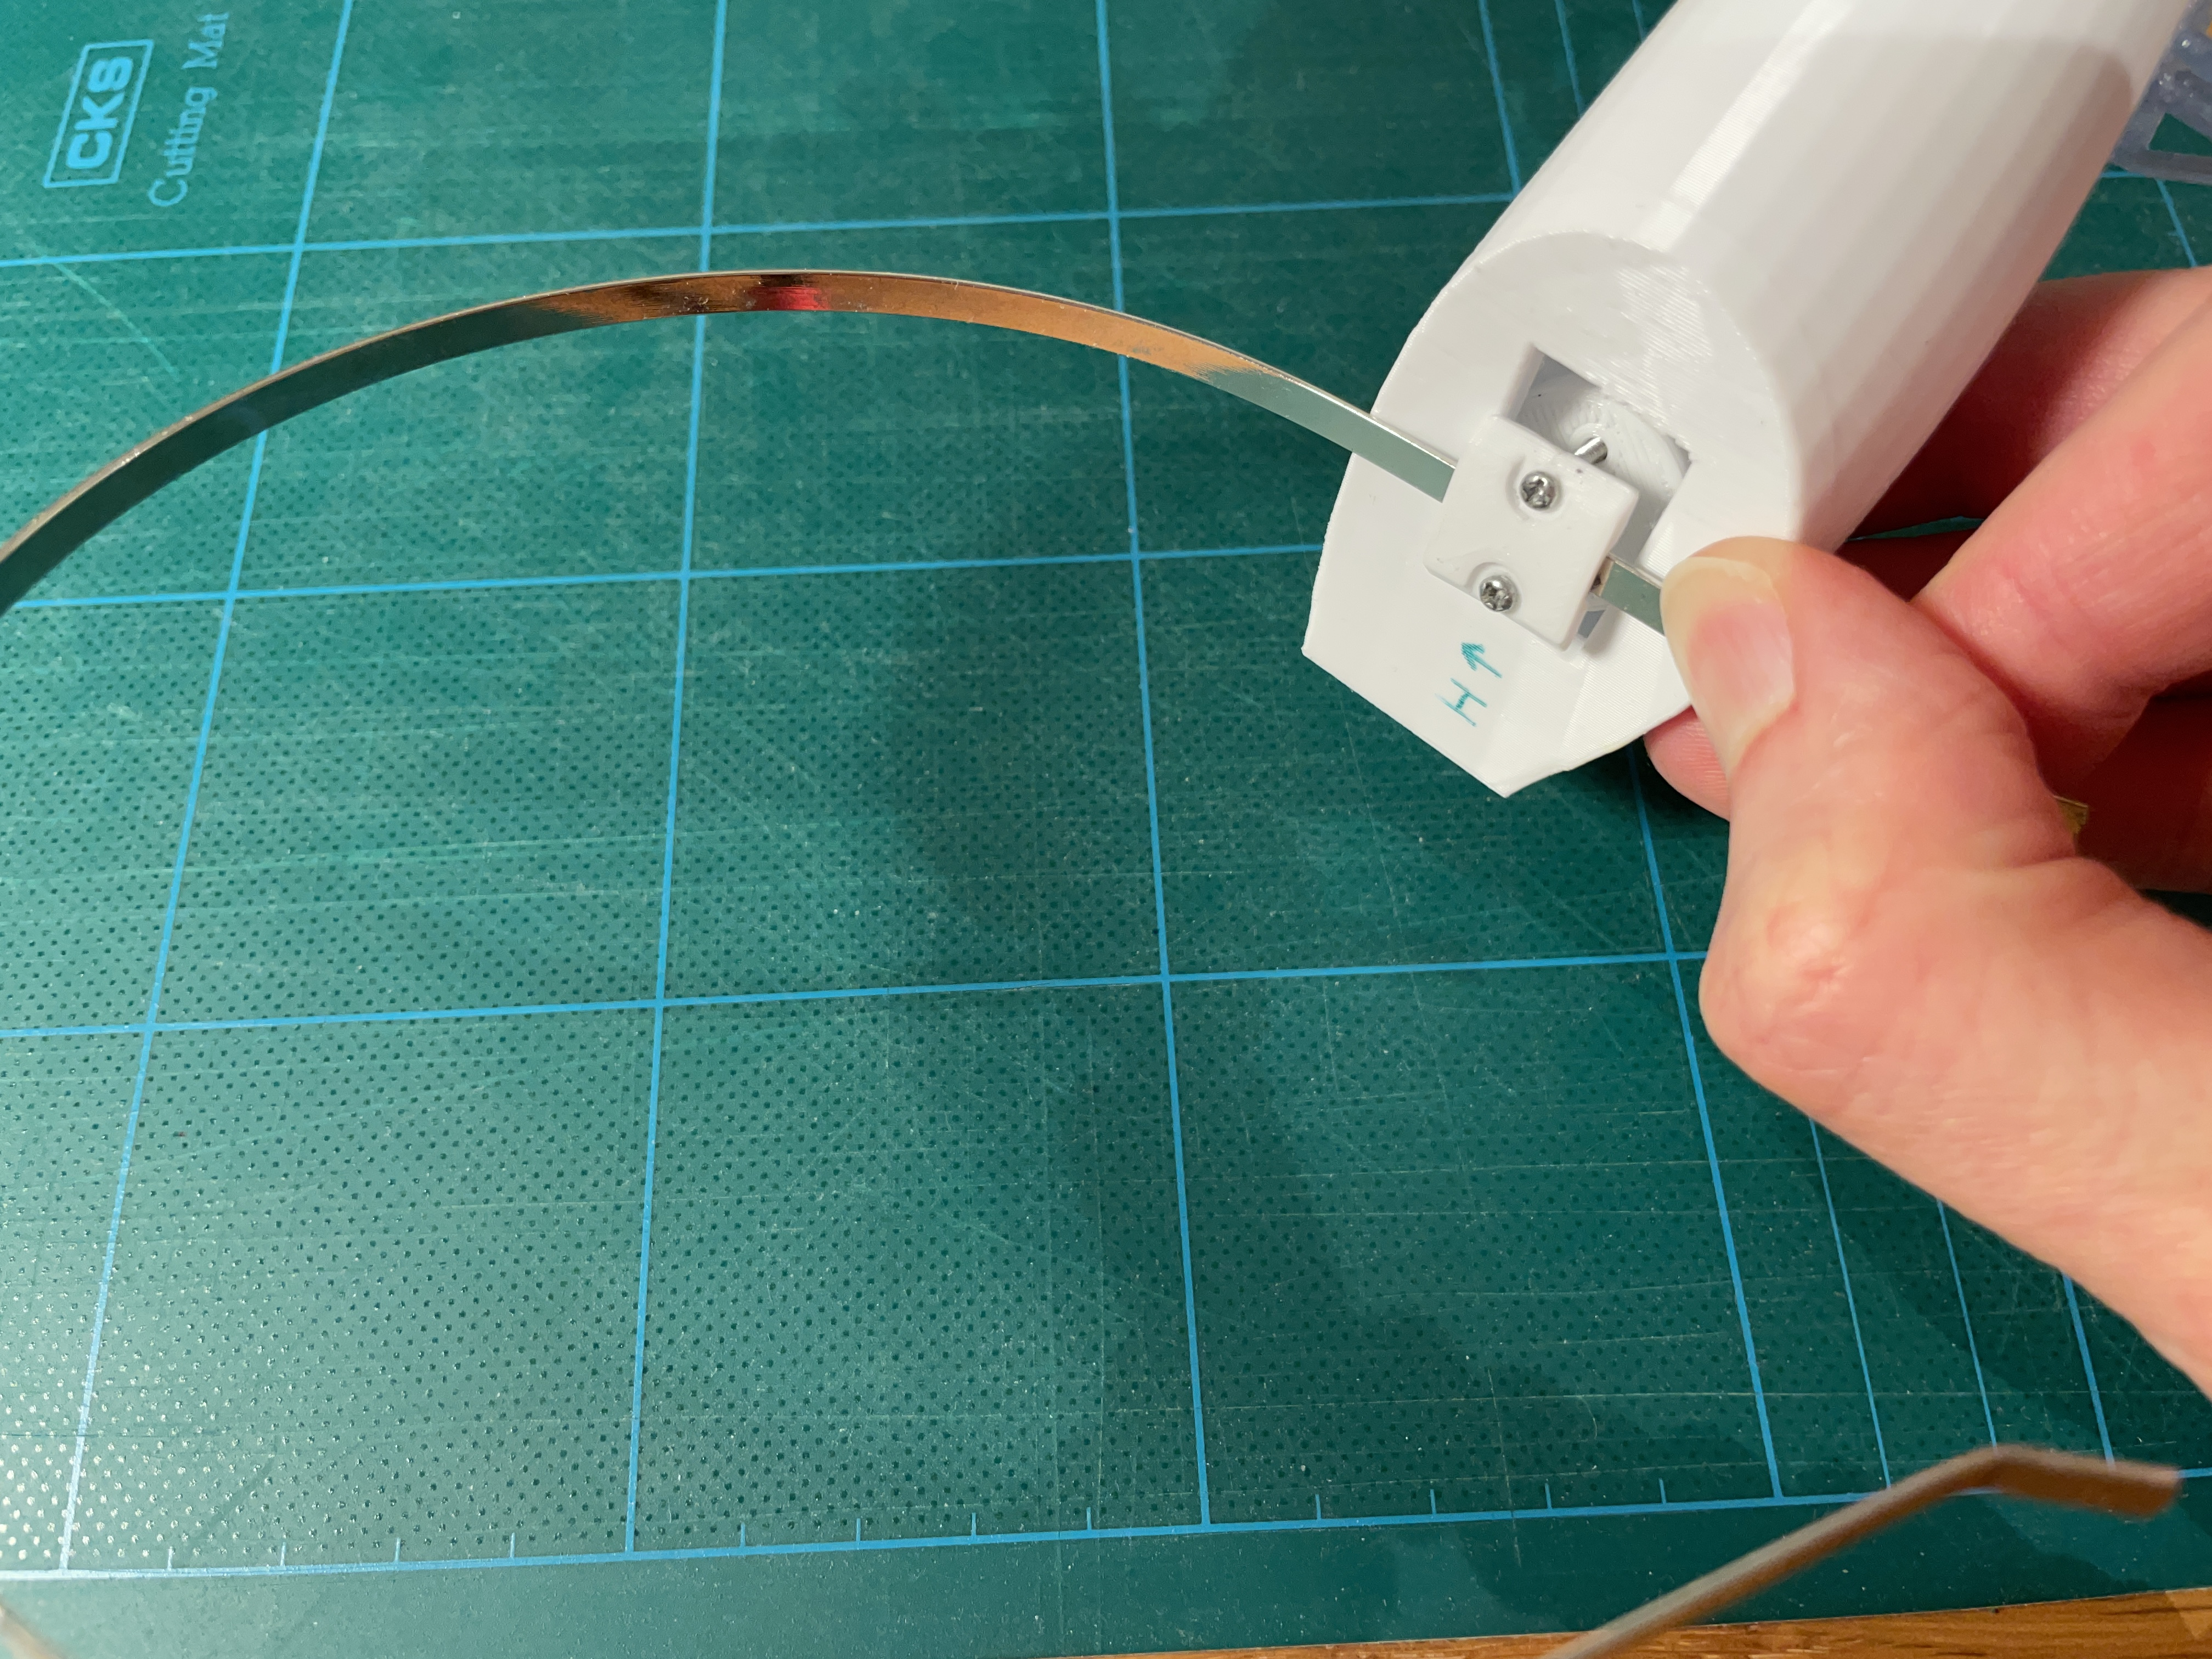
Tighten the screws evenly until the head band is squeezed against the base of the horn. Make sure that the band bracket has descended slightly into the rectangular hole so that it prevents the horn from swiveling.
Customization
The horn model were taken directly from my Finkel 3D model. If you want to customize the shape of the horns, then you can use the included blender file to generate new ones!
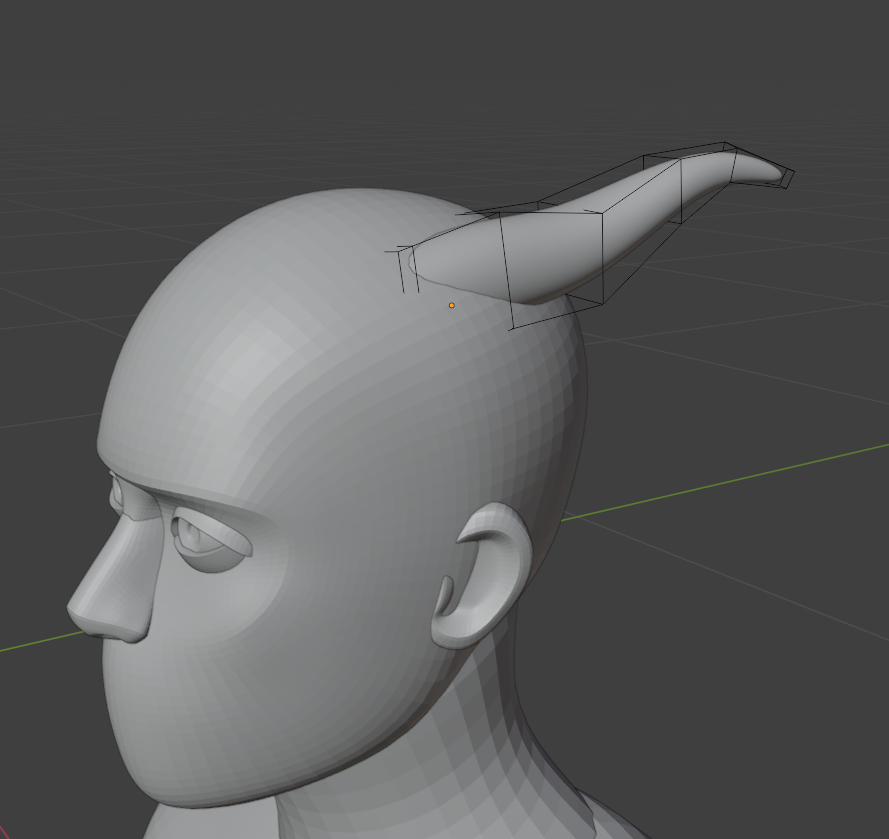
In the blender scene, there is an object called reference horn. This is used to generate the printable versions of the horn. The mesh itself is a simple cube that has been extracted outward a couple of times, so it is easy to edit and shape into something else. The subdivision surface modifier does the work of turning the boxy cube mesh into a rounded horn shape.
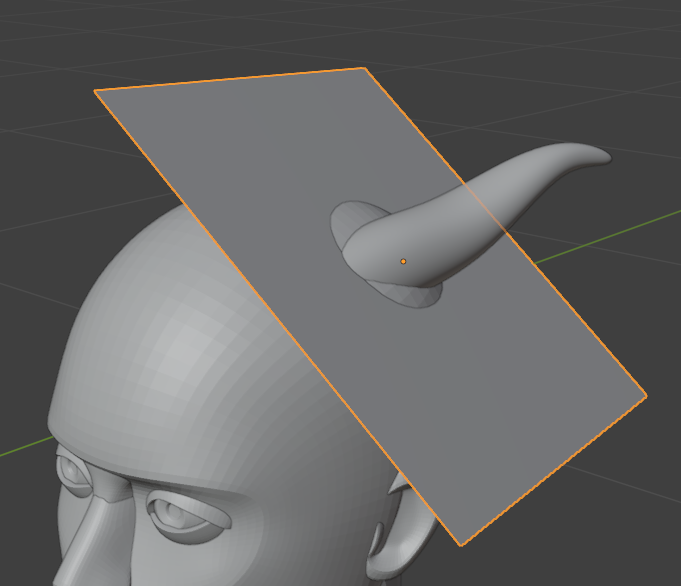
If you want to position the horn somewhere else on the head, then you should also reposition the cutting plane object so that it roughly circles the area where the horn connects to the head. This plane is used to un-rotate the resulting horn so that the base surface of it is always flush with the build plate in the end. This is necessary for properly generating the rectangular slot in the base of the horn.

The generated horns are found in the origin of the scene. There is a geometry nodes setup that takes the reference horn, hollows it out evenly and cuts a rectangular slot into the base surface of it.
There are also objects used to generate the brackets. If you get a headband that is wider than the 5mm they are designed for, you can edit the source meshes to match. You will find them in the fasteners collection.
Hopefully this all explains how to print my horns! If you have any questions you can send me a DM on mastodon. Also, if you do end up printing these, please let me know! I would be delighted to see what your results are!
Best regards,
Finkel Uxnarås